Saturday, September 21, 2013

Burger Night!


Smoky Quinoa Black Bean Burgers and Baked Sweet Potato Fries


Burgers!!! I've been promising Andrew black bean burgers for just about a month now, and oh how patiently he's waited. Until tonight. Tonight, burgers were my mission. And I think it's safe to say that success was had. And devoured...

These flavor packed little burgers really hit the spot. The combination of ketchup and liquid smoke within the burger itself created a mild, sweet BBQ flavor that really compliments the black beans. The exterior gets nice and crispy in the oven and the pureed beans remain soft inside while retaining a good bit of texture. And what better to go with black bean burgers than sweet potato fries?

The fries are crispy and sweet and so healthy! Baked and not fried, with only 1/2 tsp of oil.

This recipe makes quite a few burgers, so I baked all of these up, then froze the leftovers (place a piece of parchment paper in between burgers and store in a ziplock bag). I expect they'll last at least a month in the freezer. And the patties are gluten free to boot! Eat them the traditional way on a bun, in a pita, or on top of a bowl of greens for a nice protein addition to your salad.

Smoky Quinoa and Black Bean Burgers

Gluten Free 
Makes 10, 4" burgers

  • 2 cup cooked quinoa
  • 3 cups cooked black beans, divided (or 2 -15oz cans no salt added black beans, drained and rinsed)
  • 1/2 tsp grapeseed oil (or whatever you have on hand - olive, coconut, etc.)
  • 1 medium red onion, small dice
  • 1 celery stalk, small dice
  • 1 green bell pepper, small dice
  • 1 small zucchini, small dice
  • 3 cloves garlic, minced
  • 1 tsp salt
  • 1 tsp ground cumin
  • 1/2 tsp garlic powder
  • 3/4 tsp Mrs. Dash Chipotle seasoning (or 1/2 tsp chipotle chili powder)
  • 1/2 tsp paprika
  • 3 TBS ketchup
  • 1/2 tsp liquid smoke
  • 1 TBS cornstarch (Non-GMO!)
  • 1 TBS chia seeds, or ground flax seeds
  • 1/4 cup raw sunflower seeds or raw pumpkin seeds (optional)

Heat the oil in a medium sized saute pan over medium high heat. Add the onion, celery, bell pepper and zucchini, and saute for about 5 minutes, until the onions are becoming translucent. Add the garlic and salt, cover and continue to cook for another 3 minutes or so, until everything is tender. Allow to cool while you assemble the rest of the ingredients, or slice the sweet potatoes, or drink a cup of tea.


Pre-heat the oven to 400 degrees, and either lightly oil a sheet pan or use a piece of parchment paper. Set aside.

In a food processor, place 1/3 of your sauteed veggie mixture, 1 1/2 cups of black beans (or one can), spices, cornstarch, ketchup and liquid smoke. Process until smooth. Add the rest of the black beans, and pulse 2-3 times just to break up the beans. Taste for seasoning, and adjust if needed.

Pureed bean mixture

Preparing to mix everything together

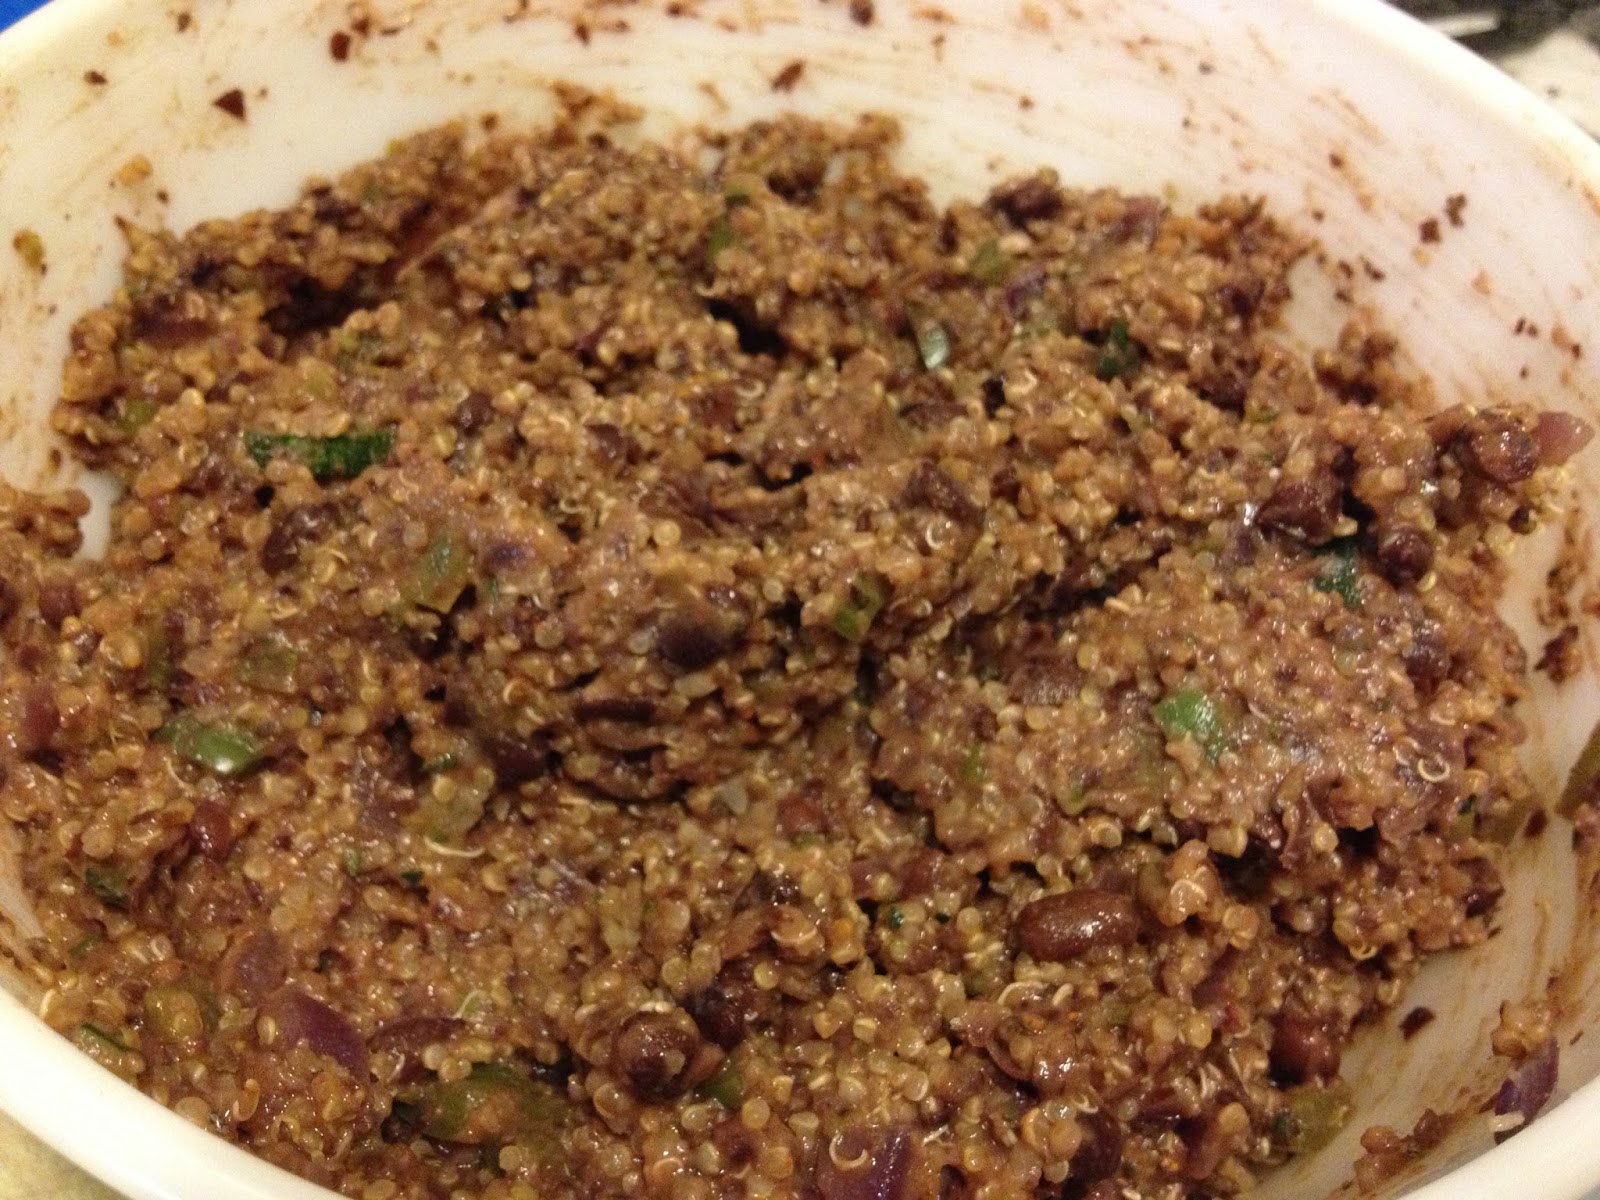
In a large bowl, mix the remaining veggies, bean mixture, quinoa, chia seeds and sunflower seeds (if desired) until combined.

Patty mixture

I like to use a 1/2 cup measuring cup to portion out the patties, so that they're all the same size. Scoop up 1/2 cup of the black bean mixture and use your hands to form a patty, about 1/2" thick and 4" in diameter.

Patties!

Roughly 4" little circles of delicious.


Place these on your sheet pan, I can usually fit about 6 on one pan. Bake for 20 minutes, then remove from the oven and very gently flip your burgers over. Bake for another 15-20 minutes or until firm and slightly crispy. Top with your favorite burger fixin's and enjoy.


Baked Sweet Potato Fries

Makes about 4 servings 

  • 2 medium sweet potatoes, sliced into roughly 1/4" - 1/2" sticks (I like to leave the skin on, but you can peel them if you prefer).
  • 1/2 tsp canola oil (or you can spray your fries with non-stick cooking spray instead)
  • 1/2 tsp salt
  • 1/4 tsp pepper
  • 1/4 tsp garlic (adjust spices to your personal preferences)

Preheat oven to 400 degrees

On a baking sheet, spread out the sweet potato fries evenly. Drizzle with the oil, and toss them about a bit to coat. Sprinkle with salt and spices and toss them about again. Spread them out evenly on the pan.

Bake at for 20 minutes, stir, and bake for another 10 minutes. Serve hot from the oven!

Now, you should be able to fit both the fries and the black bean burgers in the oven at the same time - since they both bake at 400 for roughly the same amount of time. However, I have a tiny little oven that barely fits a single pan, so I baked my burgers first, then my fries, and kept my burgers warm wrapped in foil.


Sunday, September 8, 2013

Falafel Fantasic!


Baked Falafel 

Gluten Free  

Falafel!!! Not only a fabulous word, but also an amazingly delicious little ball of chickpea goodness. This recipe is my hybrid version of two of my favorite recipes - Vegandad's Crispy Cajun Chickpea Patties and the wonderful falafel recipe from the vegan cookbook staple - Vegan With a Vengeance. I took elements from both of these recipes and mashed them together to create my version of the perfect falafel. It may not be traditional, but it is delicious.

Unlike a lot of falafel recipes, this one is not fried, but baked.  I like to bake these on parchment paper at a high heat in order to achieve a lovely crispy crust on the outside, while leaving the inside nice and creamy. I use VeganDad's technique of sauteing the celery and onion before pureeing it with the chickpeas, because I think this just creates such a nice depth of flavor and really makes the insides moist and tender. I don't use nearly as much fresh parsley as most falafel recipes usually do, simply because I'm not that fond of it. However, if you love it - please add more! I also add chickpea flour in place of regular flour, because not only does that make these gluten free, but it also works both as a binder and adds even more chickpea flavor and creaminess.

Serve these on whole wheat pita bread (not gluten free) with lots of veggies, or on a bed of fresh greens, or on their own with a side of lentil salad or tabouli. I pair these little chickpea patties with a garlicy Lemon Tahini Sauce (recipe follows), which really brings everything together.

Falafel

  • 3 15oz cans of chickpeas, drained and washed
  • 1/2 tsp coconut oil (or olive oil, grapeseed oil - whatever you like, I just like coconut)
  • 2 celery stalks, small dice
  • ½ medium onion, small dice
  • 3 cloves garlic, minced
  • 1 tsp ground cumin
  • ½ tsp ground coriander
  • ½-1 tsp salt
  • ¼ tsp paprika
  • 2 TBS chickpea flour (if gluten isn't a concern, you can just use unbleached all purpose or whole wheat flour)
  • 1TBS corn starch (non GMO!)
  • Juice of 1 lemon (about 2 TBS)
  • ½ cup parsley roughly chopped
  • Whole wheat pita bread 
  • Sliced tomatoes, kalamata olives, sprouts, spinach, sliced bell peppers, etc. 

Heat the oven to 400 degrees. Line a cookie sheet with parchment paper

In a medium saute pan, saute the onion and celery over medium high heat, until the onions begin to caramelize. Add the garlic, and saute for another minute or so, until fragrant. Remove from heat and allow to cool for a few minutes.


In a food processor (or blender - this just takes a little more work/side scraping), pulse the chickpeas until the texture resembles very chunky hummus (you still want to see bits of chickpeas). Pour half of the mashed up chickpeas into a large bowl. Now add the sauteed onion and celery, and the rest of the ingredients to the remaining chickpeas and pulse a few times, to mash them, and chop the parsley. Add the onion/celery mixture to the mashed chickpeas, and mix everything together - I usually just use my hands for this part.


Bake at 400 for 20 minutes. flip over, and bake for another 10 minutes until golden and crispy. Remove from the oven and allow to cool on a wire rack.


Lemon Tahini Sauce

  • 1/4 cup tahini
  • 2 TBS water
  • Juice of 1 lemon
  • 1 clove of garlic
  • 2 TBS fresh parsley
  • Salt to tast
Combine all ingredients in a blender or food processor, process until thick and creamy (you can add more water if it's getting too thick). Taste for seasoning, adjust if necessary, and drizzle over your falfel. This will keep in a sealed container, in the fridge for about 5-7 days. 

Saturday, August 31, 2013

Time For A Coffee Cake Break

Cinnamon Swirl Quick Bread


This is another recipe that I think originated with my brother, but to be honest, we've been making it for so long in our family that I'm not really sure where it's roots are. But it is very, very tasty. Soft, and cakey on the inside with ribbons of cinnamon sugar goodness, and just the right amount of  cinnamon crunch on top. It's fairly simple to throw together, and is best eaten within two days of being made. Eat it simply sliced, with a hot cup of tea or coffee. I have very fond memories of making this bread in the little shared kitchen of my first college apartment (one of those big late 19th century houses, that had been divided up into apartments - five unites on the first floor, and four on the second - each floor sharing a kitchen, laundry, etc.). The smell would fill the house, and slowly but surely my housemates would creep out of their rooms, and we would sit around the the kitchen table, eating cinnamon bread and getting to know one another. It made a great ice breaker.

This is also a good recipe to take to brunch, a breakfast meeting, or just when visiting a friend.

Cinnamon Swirl Quick Bread

Batter
  • 1 cup almond milk (or non-dairy milk of choice)
  • 1 tsp apple cider vinegar
  • 1/3 cup Earth Balance, or you could try using coconut oil (or 2 TBS EB + 2 TBS apple sauce, mashed banana or canned pumpkin)
  • 1/3 cup sugar
  • 1 flax egg (1 TBS ground flax seeds + 3 TBS warm water mixed together) or EnerG Egg Substitute to equal one egg
  • 2 cups whole wheat pastry flour, or unbleached all purpose flour
  • 1 tsp baking powder
  • ½ tsp baking soda
  • ½ tsp salt

Cinnamon Sprinkle
  • 1/3 cup sugar
  • 1 TBS ground cinnamon

Pre-heat oven to 350 degrees.  Lightly oil a 9”x5” loaf pan, and set aside.

Prepare the flax egg or EnerG (the box tells you how) in a large bowl, and set aside for a minute as you prepare your “buttermilk.”


In a glass measuring cup, mix the almond milk and the apple cider vinegar, and whisk lightly with a fork. Set aside to curdle, while you finish preparing the rest of your ingredients. Weird, I know - but it does amazing things for vegan baked goods!

Add the Earth Balance and sugar to the flax egg and beat together until well mixed. Set aside.

In a medium sized bowl, whisk the flour, baking soda, baking powder and salt together with a fork or small whisk to break up any lumps.


Now, begin to add the flour to the oil and sugar mixture, alternately with the buttermilk, about 1/3 at a time, until everything’s used up, and you have a nice batter.

 
In a small bowl mix together the cinnamon and sugar with a fork. Or your hands.

Cinnamon Sugar


Pour 1/3 of the batter into the loaf pan, and sprinkle 1/3 of the sugar mixture on top. Repeat this layering twice, so that you end with sugar sprinkles. 


Bake for about 45-50 minutes, or until a toothpick inserted near the center comes out clean. Cool in the pan for 10 minutes. Remove from pan to a wire cooling wrack and allow to cool completely. Slice, serve, and enjoy! 


Monday, August 26, 2013

Simple Cashew Cream

Cashew Cream


So this is really simple and super versatile. It makes the base for so many wonderful things - from creamy scalloped potatoes to a lovely salad dressing or vegan mayonnaise base. And it adapts well to both sweet and savory flavors. So many options, one simple ingredient: raw cashews. When cashews soak, they soften and blend into a thick and luscious cream.


I decided to just post the recipe for this here, so that I don't have to stick it at the bottom of every recipe I make that calls for it. Now I can just add a link :)

Simple Cashew Cream

  • 1/2 cup raw cashews
  • 3/4 cup water (plus additional water for soaking)

In a small bowl, place the raw cashews and cover with boiling water fresh from the kettle. You don't have to use hot water, room temperature water works just as well, however I find that hot water does yield creamier results.  Whatever your water temperature, cover the cashews with a small plate, and allow to sit over night on the counter. The next day, drain the cashews.

 Dry raw cashews (top right), cashews that have soaked for 24 hours (top left), soaked cashew vs. dry cashew (bottom)


Place in a blender or food processor, add the 3/4 cup of water and blend until thick and creamy. Place in an air tight container, and refrigerate until ready to use. This will keep in the fridge for about 4-5 days.


Friday, August 23, 2013

Crispy Almond Crusted Tofu Cutlets


Almond Crusted Tofu Cutlets

Gluten Free


Indulge me.

A few years ago I was an intern in the glorious city of Milwaukee, Wisconsin. And in Milwaukee, Wisconsin, Andrew (my then boyfriend now husband) and I spent a glorious year living in a one room efficiency apartment. I say this with no sarcasm. That one little room was heaven. It was cozy, and perfect, and we loved it.This tiny little efficiency had a tiny little kitchen in which I, of course, loved to cook. There was a fabulous farmers market on Saturday mornings that I always walked through on my way to work (yes, in the theatre Saturday is our Friday). And that fall I was obsessed with one thing: Butternut Squash. I'm amazed I didn't turn orange from all of the beta carotene I was ingesting. Anyway, that fall was particularly good to the local butternut squash crop, and at one point I had at least ten of the little circus peanut looking things on top of the fridge in that tiny kitchen. So when I say obsessed, I mean it.

Now, I could absolutely eat butternut squash on it's own as a meal any night of the week, and did. Frequently. However, as most of my favorite butternut squash recipes are side dishes, I was also constantly trying to find new main course recipes that would go with my plethora of of delicious squash dishes. Of all of the recipes that we went through, a recipe I found on vegweb.com for Tofu Cutlets quickly became a favorite. Andrew and I would set up our little assembly line on the 16" of counter space we had, dredge, batter and bake these up several times a month. That recipe is the inspiration for my interpretation of it, and I highly recommend giving the original recipe a go!

Now about this recipe.

One of my very dear friends who is also vegan, has also recently discovered that she is gluten intolerant. She has been inspiring me to come up with gluten free alternatives for many of my favorite recipes, because I like her and want to cook her dinner :) So last night, I was thinking about this cutlet recipe, which I hadn't made in quite a while, and thinking "I should see if I can make this gluten free..." I dug around the kitchen, until I spotted my jar of almond flour, and a light went off. Almond crusted tofu cutlets! Taking my inspiration from the tofu cutlet recipe we made in Milwaukee, I came up with a gluten free, baked and damn tasty alternative. And I must say, I like this version even better. As the nuts bake they release their oils and create a very satisfying crunch while providing a richness that you just don't get form plain old flour. Nutritional yeast gives even more depth of flavor and a very satisfying flake. I highly recommend making these along side my recipe for scalloped potatoes and some simple sauteed greens for a highly satisfying meal.


Almond Crusted Tofu Cutlets

Gluten Free

  • 1 lbs extra firm tofu, cut into ¼” slices
Breading 
  • 1/3 cup almond flour
  • 1/3 cup nutritional yeast
  • 1 tsp garlic powder
  • 1 tsp onion powder
  • ½ tsp salt
  • Pepper to taste
  • ¼ tsp paprika (optional)
  • ½ tsp dried oregano
  • ½ tsp dried thyme
  • (or, 1 tsp Italian seasoning or Mrs. Dash)

Wet Ingredients
  • 1/3 cup unsweetened almond milk or water
  • 1 TBS whole grain or Dijon mustard
  • 2 tsp corn starch
  • 1/2 tsp garlic powder (optional – can you tell that I REALLY love garlic?)

Pre-heat oven to 425 degrees.

Lightly oil a sheet pan, and set aside. You could also use parchment paper if you’re into that : )

In a pie plate, or large plate, combine the dry ingredients and mix them together with your fingers.

Almond flour breading close up.

In a second pie plate, or wide bowl, whisk together to wet ingredients.

Now, begin your breading process.


I like to set up an assembly line – wet, dry, sheet pan. It helps if you have a friend. I like to place two tofu cutlets in the wet mixture, sort of press them down so that they absorb a bit of the liquid, flip over and lightly press again. Pick them up and allow the excess liquid to drip off before placing in the dry mixture (you don’t want your breading to get too goopy), and again lightly press down into the breading, then flipping and repeating on the other side. Place breaded tofu cutlets on the sheet pan side by side about ½” apart (depending on the size of your pan), and continue until you run out of tofu.

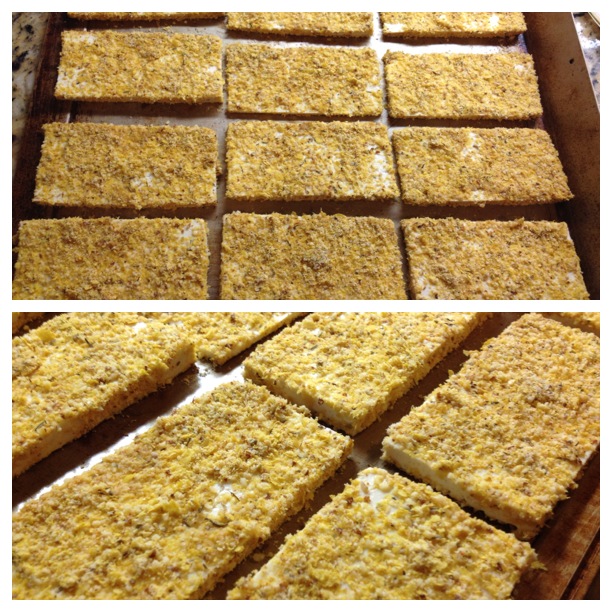
Breaded cutlets before going into the oven
Bake for 15 minutes, then remove from the oven, flip over and bake for another 15 minutes until crispy and golden. Remove from the oven and serve!

Crispy and perfect after a half hour of high heat baking.


With scalloped potatoes and sauteed kale and onions. Mmmmm...


Monday, August 19, 2013

Comforting Creamy Potatoes To Fend Off The Impending Stresses of Graduate School.

 Creamy Scalloped Potatoes with Roasted Garlic Cashew Cream

Gluten and Soy Free


The past few days I've been craving scalloped potatoes. The kind we used to have when I was little (pre-vegan), that came out of a box with those dried little discs that magically became potatoes. I loved the soft, creamy cheesy goodness, and for some reason I've been craving that same comforting feeling recently. It may be the impending school year, with all of the hustle, the meetings, the long nights and the little time I'll actually be able to spend in the kitchen once it all begins again. Yep. That's probably it. Anyway, I decided to come up with a vegan version, utilizing one of my favorite vegan power foods - the raw cashew! It makes phenomenal raw cheesecakes and deserts, and luxurious vegan cream sauces and cheeses, all while packing a powerhouse of healthy nutrients and protein. I love it. And what better ingredient to help make a healthy vegan version of a a heavy cream and cheese laden classic like scalloped potatoes? To amp up the flavor I added a few cloves of sweet and mellow roasted garlic to the cream sauce. Added to that we have nutritional yeast, Dijon mustard, paprika and a hint of nutmeg just to tie everything together.

I originally tried this recipe with Yukon Golds, and it was really good, but not quite what I had hoped it would be. The next time I tried it, I used Russets, and OMG what a difference! They were perfection, absolute perfection. Couldn't stop eating them. So good. All potatoes are not created equal. At least, all potatoes are wonderful and beautiful in their own unique and individual ways, but Russets were made for this recipe. I think red potatoes would also be quite nice, but Yukons were just to hearty. The Russets just melt in your mouth. To make these even fancier, you could totally add some fresh chives, thyme, or even rosemary to the cream sauce. I just didn't have any on hand last night. I served this with brown rice and sauteed lemony garlic kale, but it would be a great side dish to a whole range of main dishes. I hope you enjoy it!

Scalloped Potatoes with Roasted Garlic Cashew Cream

  • 1 recipe roasted garlic cashew cream (recipe follows)
  • 1 cup unsweetened almond milk, or water
  • 1 tsp Dijon mustard
  • 1/2 tsp garlic powder
  • 1 tsp onion powder
  • 1 tsp salt
  • 1/8 tsp pepper
  • 1 bay leaf
  • 1/4 tsp paprika
  • 1/4 cup TBS nutritional yeast
  • 1/4 tsp freshly ground nutmeg
  • 2 lbs Russet potatoes, thoroughly washed, peeled and cut into 1/8" slices

Pre-heat oven to 400 degrees. Lightly grease a casserole dish (I usually just take about 1/4 tsp of olive oil, and a clean dish cloth or small piece of paper towl, and smear it all around the dish), and set aside.

Slice your potatoes and place them in medium sized bowl. Set them aside while you make your cream sauce.


In a small sauce pan, whisk together your roasted garlic cashew cream and all remaining ingredients over medium heat. Continue to cook for about 5 minutes, or until everything is just heated through - you don't want it to quite reach a simmer or boil, because you'll be touching it with your bare hands. Remove from the heat, and pour half of the cream over the potatoes in the bowl. Mix about with your hands or a spoon (if it's too hot - give it a minute, pour yourself a cup of tea, check your e-mail, come back in a bit), making sure that all of the potatoes are nicely coated with the cream sauce.


Now, pour a few tablespoons of your left over cream sauce in the bottom of your casserole dish, and sort of tilt your dish from side to side so that the cream coats the bottom of the pan.


Begin layering your potatoes into your casserole dish. You can fan them out in a circle, in neat little rows, or as haphazardly as you please, as long as their fairly evenly spaced, so that they cook evenly.

I like to set out a layer (neatly or not), then pour a few spoonfuls of cream the reserved over the potatoes before beginning my next layer.


Once you've run out of potatoes, pour whatever cream sauce you have left from the bowl on top of the potatoes. Sprinkle with a little more paprika if you like, cover with tin foil, leaving a small corner open so that steam can escape, and bake covered for about 50 minutes.

My sprinkles were a little on the heavy handed side...

Remove the tin foil, and baked uncovered for another 15 minutes until bubbly and golden brown.


Roasted Garlic Cashew Cream

  • 1/2 cup raw cashews, soaked overnight
  • 1/2 cup water
  • 6 cloves garlic, peeled
  • 1/4 tsp olive oil
  • pinch of salt

The night before you're going to make this recipe, put your raw cashews in a bowl and cover with water. Cover with a plate and let soak overnight.

The day of- roast your garlic! Pre-heat your oven to 425 degrees. 


On a small piece of aluminum foil - about a 10" rectangle folded over to make a 5" square - place your peeled garlic cloves, cover them with 1/4 tsp olive oil and a pinch of salt. Wrap up the sides tightly to create a little tin foil packet, and place in the oven for about 35 minutes, or until your house smells like a giant bulb of garlic. Remove from the oven, carefully open your packet, and set aside to cool.


While you're garlic is roasting, you can make your cashew cream. Drain your soaked cashews and place them in a blender or food processor 1/2 cup of water and process until smooth and creamy - about a minute (if you need to add a little more water, go ahead - you want a coconut milk-like consistency).


Add the roasted garlic cloves, and pulse a few more times just to break them up. Place in the fridge until you're ready to use it.


Sunday, August 18, 2013

Lunch Simplicity

Chickpea Salad


I'm not going to talk a whole lot about this recipe. It's simple, it's delicious, and it makes a great light and refreshing summer meal. I enjoy it on top of a big salad in lieu of dressing, on toast or in a pita. In college I used to eat this on toast all the time - I love the creamy textures of the salad atop nice crunchy toast. It's basically a vegan version of chicken or tuna salad, but so much healthier for you! It's simple to throw together, and keeps well in the fridge for 4-5 days. Feel free to adjust the spices to your tastes, and see what you come up with :)

Chickpea Salad


2 - 15oz can chickpeas, drained and rinsed*
2 celery stalks, cut into 2" chunks*
2 carrots, cut into 2" chunks*
1/4 of a small onion very small dice (optional)
1/2-1 tsp garlic powder
2-3 TBS vegan mayonnaise (I used this fabulous tofu-cashew mayo from Fat Free Vegan Kitchen)
1-2 TBS whole grain mustard
4 TBS sweet relish (optional)
1/4 tsp seasoned salt

In a food processor, pulse the celery and carrots until they are finely chopped. Add the chickpeas and process until they begin to break up and become creamy, with just a few large pieces remaining.

*If you don't want to use a food processor, just finely dice the celery, grate the carrots, and mash the chickpeas with a potato masher.

 Pour the chickpea/celery/carrot mixture into a medium sized bowl, or glass storage container. Add remaining ingredients, mix, taste for seasoning, and eat! So easy!